
Introduction — a quiet scene, a clear number, a simple ask
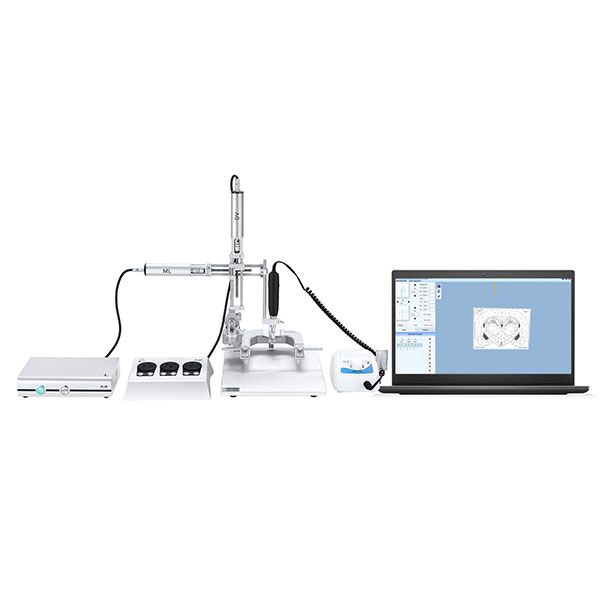
I once watched a trainee pause at the lab bench, breathing out before a delicate implant—she looked calm but I could see the weight of the moment. In my experience that stillness matters, because tiny errors add up: in a batch of fifty procedures, a few millimeters off can change outcomes by 20% or more. The second tool on the bench was the automated stereotaxic Instrument, sitting ready to reduce that human jitter. (I like to think of tools as partners—not replacements.) So here’s the question I keep coming back to: how do we choose and use these instruments so they really help researchers, not just add complexity? Let’s walk through that thought together, quietly and clearly, and then dig deeper into what most people gloss over.

Where the rubber meets the skull: what’s failing now
stereotaxic apparatus mouse setups promise repeatability, but I find many labs still struggle with repeatable placement and hidden workflow friction. Directly put: traditional rigs often fail because they mix manual alignment with fragile electronics. Micropositioners stick or lag, servo motors may introduce tiny vibrations, and calibration routines are treated as an afterthought. Look, it’s simpler than you think—if you accept that the system is only as strong as its weakest step.
Let me be frank: users tolerate ugly workarounds. They tape foam to holders, they sketch coordinates on paper, and they hope the headstage stays put. That kind of improvisation saps time and morale. It also produces uneven data. I’ve seen experiments where a single sloppy insertion meant re-runs for three weeks. If we want better science, we must address those pain points—sensor drift, poor ergonomics, and desktop setups that don’t scale. One more thing: documentation and user training are often the missing calibration step; without them, even the best hardware underdelivers.
So what can we fix first?
Start with the basics: reliable clamps, clear digital readouts, routine checks for encoder offsets. Those small moves reduce retries and frustration fast.
New principles for automated precision — and where we go from here
Moving forward, I want to focus on the principles that actually change practice. First: closed-loop feedback. When a system keeps checking its own position with precision encoders and corrects automatically, you reduce cumulative error. Second: modular ergonomics. If the rig accepts interchangeable headstages and micropositioners, labs can adapt without reinventing the bench. Third: predictable workflows—software that guides a user step-by-step, with clear calibration routines and simple error messages. These aren’t buzzwords; they are practical moves I use when advising teams.
Take a moment to picture a working setup where a stereotaxic apparatus mouse routine runs like a short script. The apparatus centers, sensors verify alignment, the arm advances and checks again. We log each step. It’s not magic—just layered safeguards. And yes—funny how that works, right? This reduces the need for bloated SOPs and turns training into a confidence builder. I believe combining robust hardware (servo motors, precision encoders) with clear software flows will shape the next wave of lab reliability.
What’s next for everyday labs?
We should expect better integration: smoother interfaces between instrument and data systems, better diagnostic logs, and more realistic lifetime testing. I’m optimistic that these shifts will cut bad runs and free up time for real science.
Choosing the right instrument: three practical metrics I use
We wrap up with three metrics I ask about when comparing systems—simple, measurable, and human-friendly.
1) Positional repeatability: ask for 95% repeatability specs over typical insertion distances. This tells you how often the device returns to the same spot. 2) Workflow latency: measure time from setup to successful placement (including calibration). If the latency is high, the tool is stealing minutes every run. 3) Serviceability and documentation: can your team swap a headstage and re-run a calibration in under 15 minutes with clear steps? If not, expect downtime. These are practical checks I perform in person, and they tell you more than marketing slides ever will.
In short: trust tools that prove their claims in the lab, not on paper. I’ve seen brands that look great in spec sheets but stumble in daily use; that’s a hard lesson I learned the long way. If you’re ready to explore reliable, user-minded options now, take a look at what BPLabLine offers—thoughtful design, clear docs, and real-world focus. We owe our work better tools, and I’m glad to see that shift happening.